Connecting to SunLab and other SSH Hosts with VS Code
Visual Studio Code allows for direct integration with and connection to remote environments via a number of popular protocols including SSH. This allows for easy interaction with the SunLab environment.
Important
Log into the SunLab environment via a standard PowerShell or Terminal window before attempting the steps in this document. This ensures you have the correct password and network connectivity before layering on the complexity of connecting to a remote enviroment via VS Code. VS Code also makes troubleshooting SSH connections difficult due to limited feedback about underlying connectivity issues.
Installing the VS Code Remote Explorer SSH Extension
Note
If you are not connected to a Lehigh Network or are connecting from outside of campus, you will need to be connected to Lehigh's VPN prior to being able to connect to SunLab via the instructions herein.
Launch Visual Studio Code (see the installation instructions for your operating system in the menu system to the left if you need assistance launching Visual Studio Code).
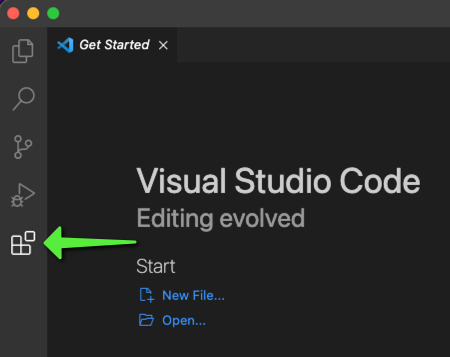
From the main VS Code interface, click on the Plug-In/Extensions button:
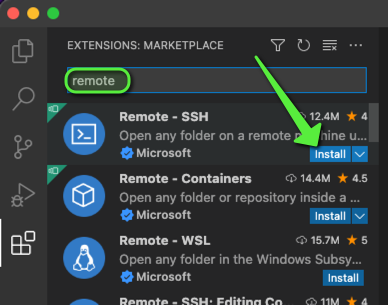
In the search field at the top, type 'remote' and press Enter or Return on your keyboard. Locate the 'Remote - SSH' extension from Microsoft and click on the blue Install button.
Note
There are other Remote Extensions for varying popular protocols. Those are outside of the scope of this document. This document is strictly for enabling SSH connectivity from VS Code.
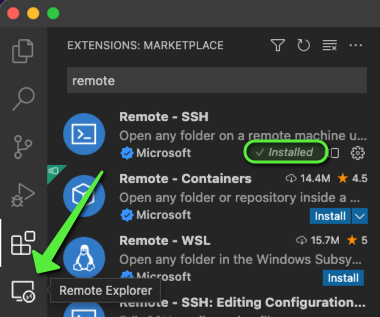
The installation has completed once the Extension shows 'Installed' on the Extension browser.
Launching the VS Code Remote SSH Extension
You will see the Remote Extension button on the left side of the VS Code Screen, click on it:
Configuring a connection to SunLab (or other SSH Host)
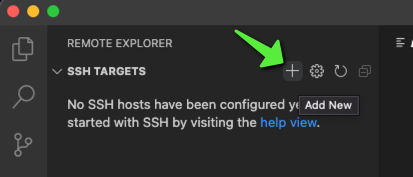
From the Remote Explorer window, click on the + button that is next to 'SSH Targets'. This screen will show separate sections for other remote protocol extensions that are enabled/installed within VS Code.
You will be prompted to 'Enter SSH Connection Command':
Enter the following command at the 'Enter SSH Connection Command' prompt and press Enter or Return on your keyboard:
ssh lid123@sunlab.cse.lehigh.edu
Note
Naturally, substitute your Lehigh ID for lid123 in the command above. Optionally, substitute a different hostname for sunlab.cse.lehigh.edu if you are connecting to an alternate SSH host.
At the 'Select SSH configuration file to update' select the top option reflecting your User folder:
Connecting to SunLab (or other SSH Host) with the VS Code Remote SSH Extension
After completing the configuration of the SSH connection within VS Code's Remote SSH Extension, you will see the newly added host in the list under 'SSH Targets'. Click on the 'New Window' button to begin the connection process:
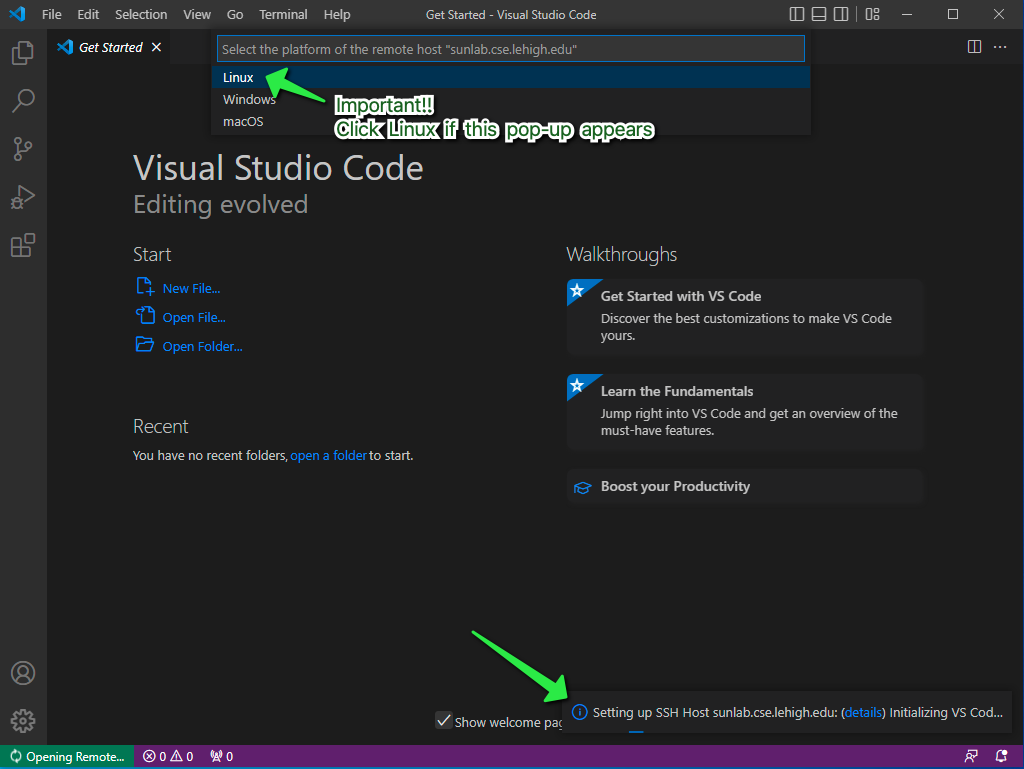
You will see VS Code begin the installation of the VS Code server binary at the bottom right corner of the screen. Keep an eye out for a pop-up at the top of the screen asking you to 'Select the platform of the remote host'. If you are connecting to SunLab it is crucial to select Linux here:
Warning
If you are connecting to SunLab, selecting anything other than Linux in the above step will cause the connection to fail. The prompt is asking about the remote host, not your local machine. SunLab runs Linux.
When the new VS Code window opens, it may prompt for accepting the SSH host fingerprint. Click on Continue:
You will then be prompted for the SSH connection password. If you are connecting to SunLab, this will (obviously) be your SunLab password.
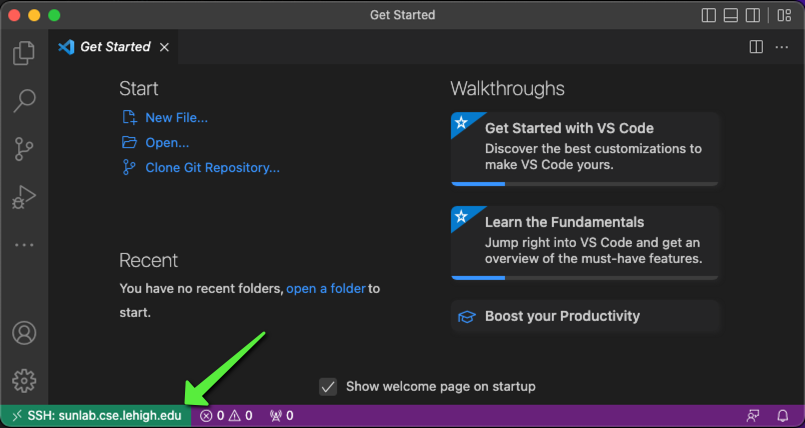
At this point, the VS Code window shows the SSH connection established on the lower-left corner:
There is not a lot of feedback at this point that the connection succeeded. If there are no errors, the connection has worked properly.
Reconfiguring an existing SSH Connection
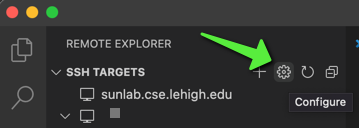
From the Remote Explorer - SSH section of VS Code, click on the ⚙ Gear/Sprocket icon
Select the top option reflecting your User folder at the 'Select SSH configuration file to update' prompt:
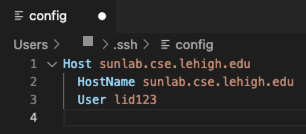
VS Code will open the SSH config file for modification:
The top line for 'Host' in this example is the title of the SSH Target on the left, in the following example we have modified the SSH Target to show the username as part of the title:
